


In today’s world, security is ubiquitous. At home, at work, on the road, on your phone: even your private diary is security-protected. For unlocking all this we use keys, passwords, security plans, fingerprints and even facial recognition. So many security systems, and so many passwords to be created!
The “digital identity” was therefore created so as to be uniquely identifiable on all services implementing this type of authentication.
Sure enough, everyone is in on it: Facebook, Twitter, Google +, LinkedIn, to name but a few. The problem is that they do not all use the same authentication protocols (OAuth 2 for Facebook, OIDC for Google, for example). These ID providers then allow us to access service providers (e.g., Spotify).
As developers, when we want our services to have the same type of authentication, we are obliged to implement each provider individually. It gets tiresome to keep having to create authentication modes. It takes a lot of work, it is a source of error, and it requires countless updates.
Identity and access managers: identifying them and checking out their benefits
Fortunately, this problem has been addressed by the creation of access managers. A single account linked to all your accounts. This offers many benefits, for everyone:
For users |
For developers |
|
– One account to rule them all |
– No specific implementation for each ID provider – No app(s) update needed each time the SDK is updated – App / delete an ID provider without touching the application source code |
So why not try using one? Only, which one to choose?
Keycloak? Firebase? How does an access manager work?
As you are no doubt aware, there are many access managers:
- Keycloak (from Redhat)
- Firebase (from Google)
- Azure Active Directory (from Microsoft)
- Auth0
- LoginRadius
- etc.
As you will have understood, some are proprietary and paid while others are free. Yet what is the principle behind the operation of an ID provider? Let us take the simple case of a mobile app that wants to authenticate one of its users. Three authentication methods are possible for this app:
- Classic authentication (username and password)
- Via Facebook
- Via Google Plus
But what happens next?
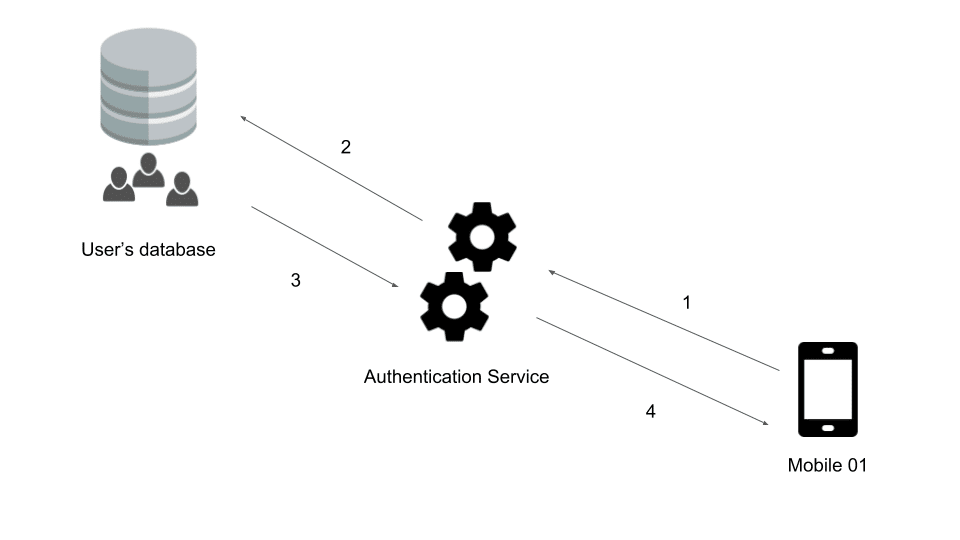
- Authentication request to the service concerned (query containing the user ID)
- The authentication service searches in its database for a user associated with this ID.
- In the affirmative, a token is generated.
- The token and the refresh token are sent to the mobile app.
This means you get a token that can be used on a unique basis with your API(s). Whether the user has logged in via password and username or via Facebook, the token will be generated transparently, and can be used in the same way by all parties concerned.
Of course, some of these steps can be hidden by the SDKs used.
Keycloak: the ideal identity manager?
Here I have chosen to test Keycloak from RedHat. I could have tried Firebase, which is the most well-known and is very easy to use, but it is a paid solution and the server on which your data are stored is a Google server.
Why did I choose Keycloak?
Quite simply because it is free, easily deployable, has several adapters written by its creators to be easily integrated in mobile apps and, above all, it is open-source! Not bad considering what has been done with it.
Keycloak is therefore proposed by RedHat and developed in Java. As I said above, it has the particular feature of providing a certain number of adapters capable of making our lives as developers easier. We can therefore find Java adapters (for Spring, Java Servlet or TomCat), but also Javascript and Node.JS adapters. It is therefore very easy to secure your websites and APIs using this technology.
What are its direct competitors? Well, there are WSO2 and OpenAM, for example.
The strong points of Keycloak
Administration GUI
Keycloak has the great advantage of providing a GUI enabling direct administration of your data (users, realms, roles, etc.) from a web page. With just a few clicks you can create a new realm, a user, a client, and that’s it: you can get connected!
Manages all classic authentication protocols
What is more, Keycloak manages a whole load of different authentication layers. These include, in particular, OpenID, OpenID Connect, OAuth, and SAML. Yet you might say: “My users exist already, I just want to reuse them, not re-create them.” Well, that’s just fine, because it is also capable of connecting directly to several types of database (LDAP, Kerberos, etc.).
An integrated social network gateway
As if that were not enough, RedHat has included in its ID provider the possibility of configuring social networks, for logging in using them. And if one of your favorite sites is not supported in the basic configuration, no problem! You can create a Keycloak extension (the advantage of open source!) or use the standard protocols already implemented in Keycloak: OAuth and OpenID.
Account management with task automation
Added to this is the possibility of directly managing the registration of users and the automatic sending of emails for verification, loss of password and account update.
Two-factor authentication
And to top it all: if you want to keep up-to-speed and go for maximum security by proposing two-factor authentication, you can do this too!
All this means that 80% of the work is done! It is now up to you to take care of the remaining 20%: defining your own roles, the flow to be used, customizing the appearance of the login and registration pages, and the emails. And of course, implementing on your websites and mobile apps the authentication of your users. As you can see, only the part that is truly specific to your environment / application remains to be done. You can therefore focus solely on your mission. So, to your keyboards!
Right now we’re going to look together at what Keycloak really is made of, and just how all this works. So rather than explain, let’s have a demo!
A bit of practice with Keycloak
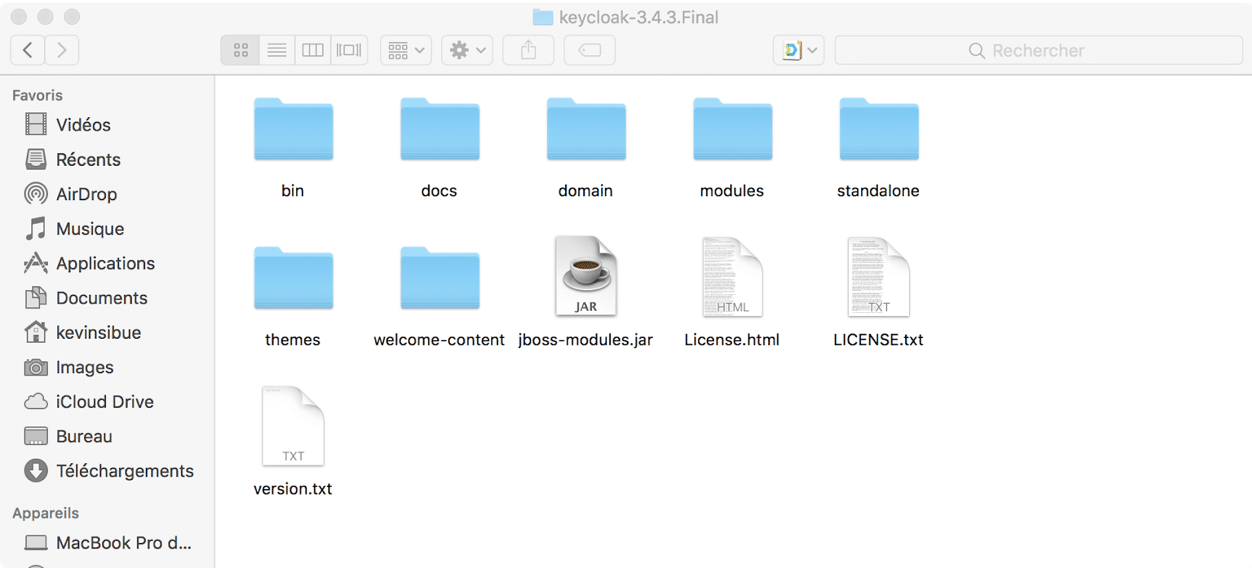
Let us start by downloading Keycloak: this could not be easier, it is available for free from https://www.keycloak.org/. I advise you to download the latest stable version (3.4.3.Final at the time of my writing this article).
You will get a folder looking like this:
Here you already have your server! Which is pretty awesome!
You will notice that I am using a Mac for doing my tests. And this is the beauty of Java: you can run it anywhere – provided it is installed, of course! I now invite you to use your preferred platform and follow me in installing and configuring a Keycloak test server.
Now let us run this famous server, and let’s see what it has in store for us. Just watch: you’ll not be disappointed!
To do so, it could not be easier: open a terminal (or command prompt in Windows), go to the “bin” folder and run the standalone scrips (standalone.sh for Linux and Mac and standalone.bat for Windows).
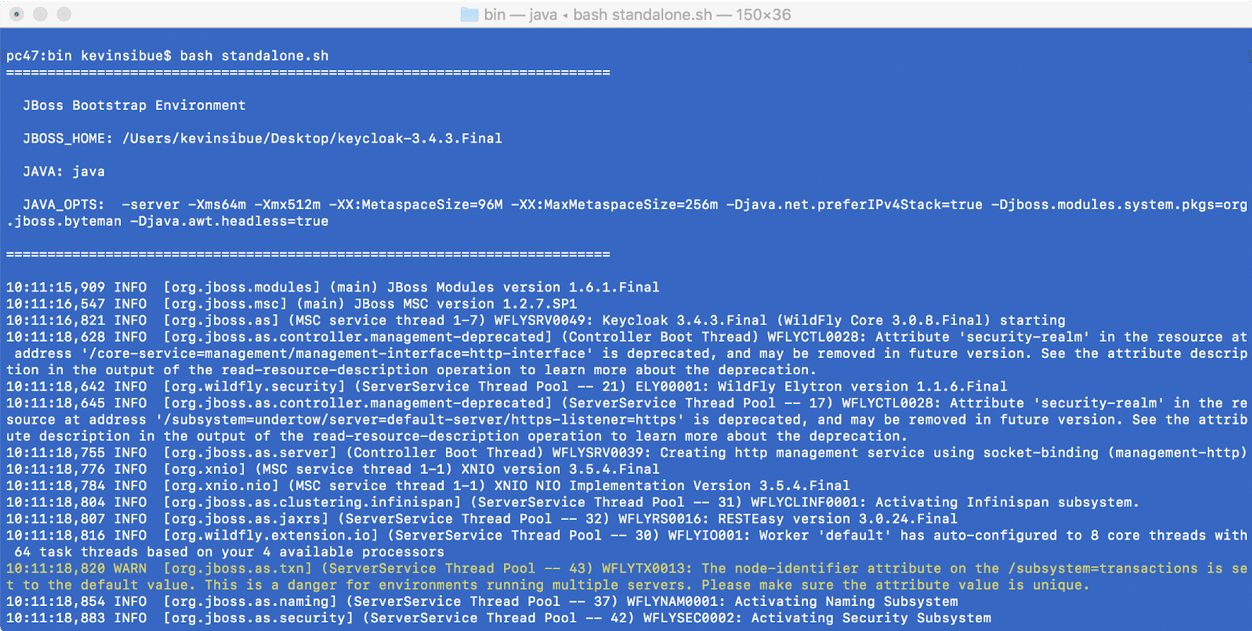
If all goes well, you should obtain the following line:
“INFO [org.jboss.as] (Controller Boot Thread) WFLYSRV0025: Keycloak 3.4.3.Final (WildFly Core 3.0.8.Final) started in 14663ms – Started 545 of 881 services (604 services are lazy, passive or on-demand)”
This indicates that your WildFly server is up and running and the Keycloak services are available.
Now let us go directly to the address: “http://127.0.0.1:8080/“. You will see the Keycloak interface. Right now, since it is our first connection, Keycloak asks us to create the administrator of our server:
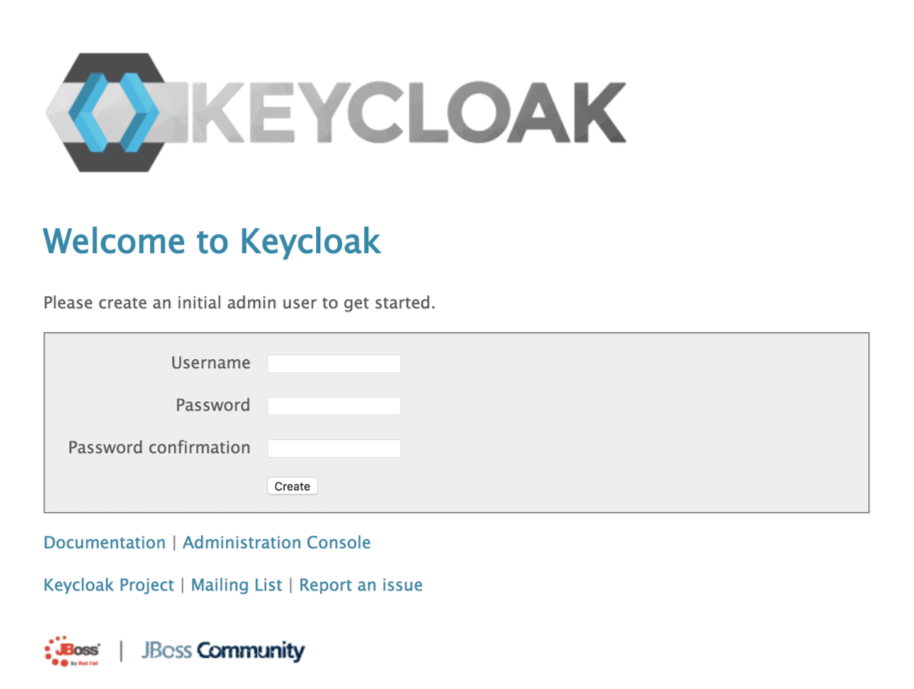
Feel free to choose your credentials. Once your user is created, it’s time to go to the administration console. At last we get to see the inner workings! You will find yourself in a realm called “Master”. For the purposes of our demo, we are going to create a new one.
Click on “Master” and you will see a button: “Add realm”. Click on it. I suggest calling our new realm “Demo”:
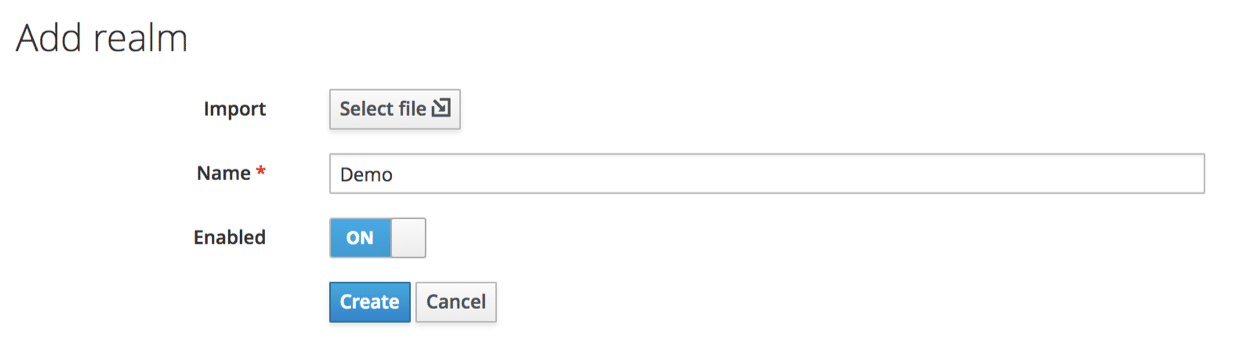
A realm secures and manages the security data for a set of users, applications and registered clients. It is also possible to manage the roles (authorization types) directly at realm level, and you can also configure user role mapping to allocate these authorizations to specific users.
We now need to define a new client. To do this, go to Clients / Create. A client corresponds to a client who wishes to use our authentication service. These are therefore not users but applications, such as our API, our website or a mobile app.
In the present case, we shall use “postman” for making our queries. We are therefore going to create a “Postman” client.
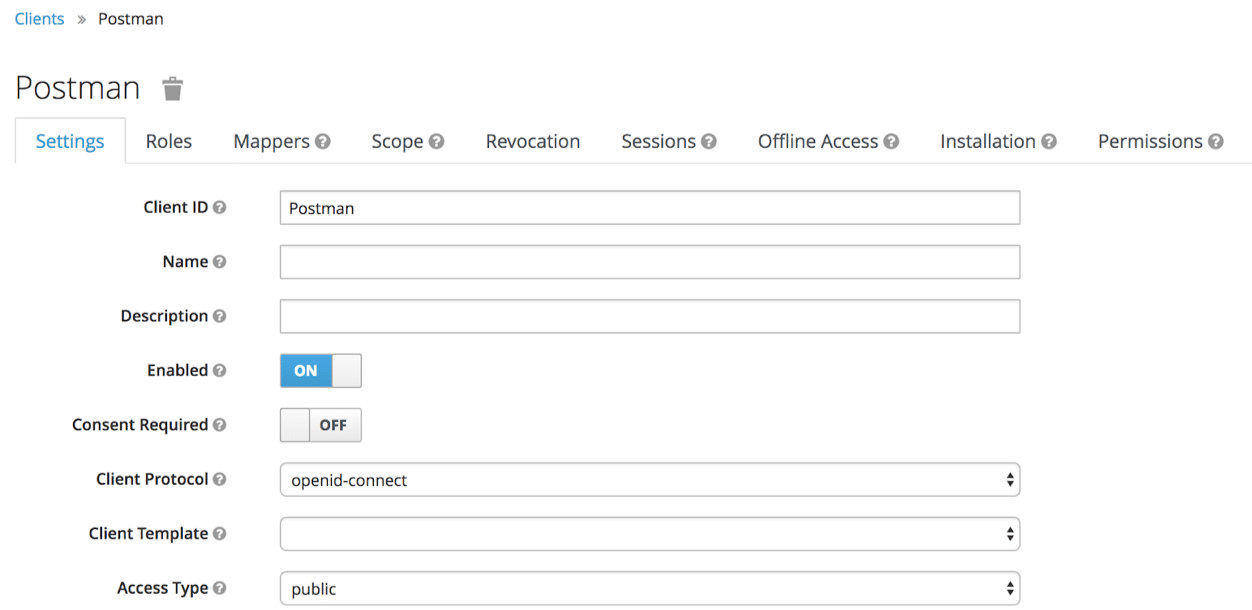
Note that here I wish to use the “OpenID-Connect” protocol, although it is of course also possible to use SAML, but for the purposes of our demo we shall stick with the former. You can also see that the “Access Type” attribute is “public”.
What does this mean, and what our options in this regard?
We have chosen to use OpenID-Connect: the Access Type is directly linked to this protocol:
Confidential
Confidential access type concerns server-side clients who need to connect to the browser and ask for a client secret when converting an access code into an access token. This type is to be favored for server-side applications.
Public
Public access type is meant for clients that need to connect to the browser. With a client-side application, there is no way of keeping a secret in complete security. Instead of this, it is very important to restrict access by configuring the correct redirection URIs for the client.
Bearer-Only
Bearer-only access type signifies that the application only authorizes bearer token requests. If this option is activated, this application cannot take part in connections with the browser.
It is therefore vital to choose the right type of access according to the client you will be using. Of course, you can have several clients each with a different access type.
For our demo with postman, we shall simulate a call from a mobile app. Consequently, the “Public” mode will be perfect!
We therefore need to define a redirection URL. Here we shall use: http://localhost
Now we need to create a user for our tests. Since we have changed realm, our own user will no longer be available. Create your user, as you like.
Let us now make our first token request. Open Postman (or an equivalent). To contact Keycloak and obtain a token for a client in bearer-only, you need to call up the following address:
http://localhost:8080/auth/realms/[OUR_REALM]/protocol/openid-connect/token
Remember to replace [OUR_REALM] with the name of your realm, i.e.: in this case “Demo”.

Of course, since this involves authenticating a user, it will be necessary to provide certain information:
- username (generally the user email)
- password (non-hashed password)
- grant_type (authentication type, in this case by password)
- client_id (ID of client seeking authentication)
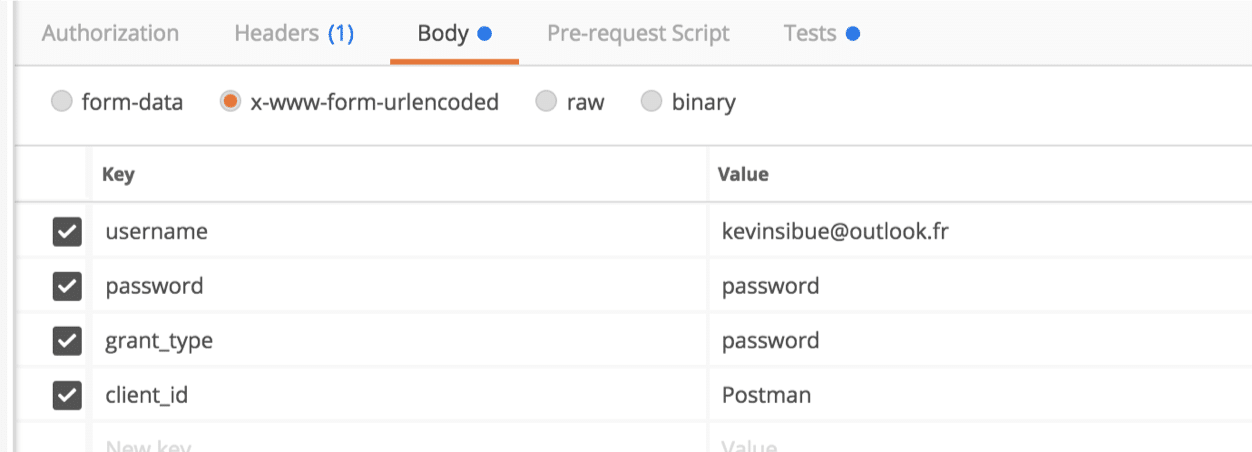
With all the information entered in the body of our query, we can run the token request:
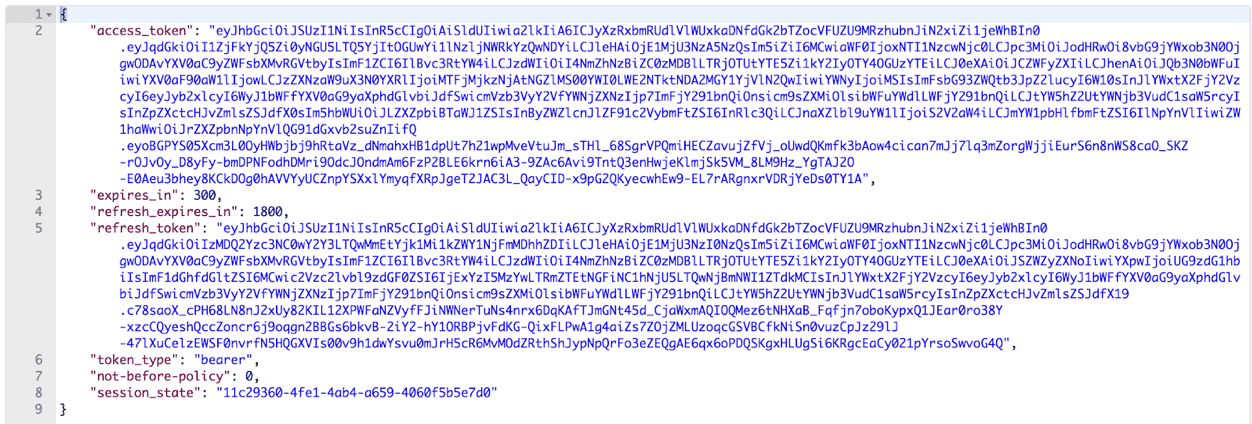
As you can see, the generated token is very long. Yet this is normal, since it contains a great deal of data. This is in fact a JWT token, easily parsable for obtaining the “hidden” data:
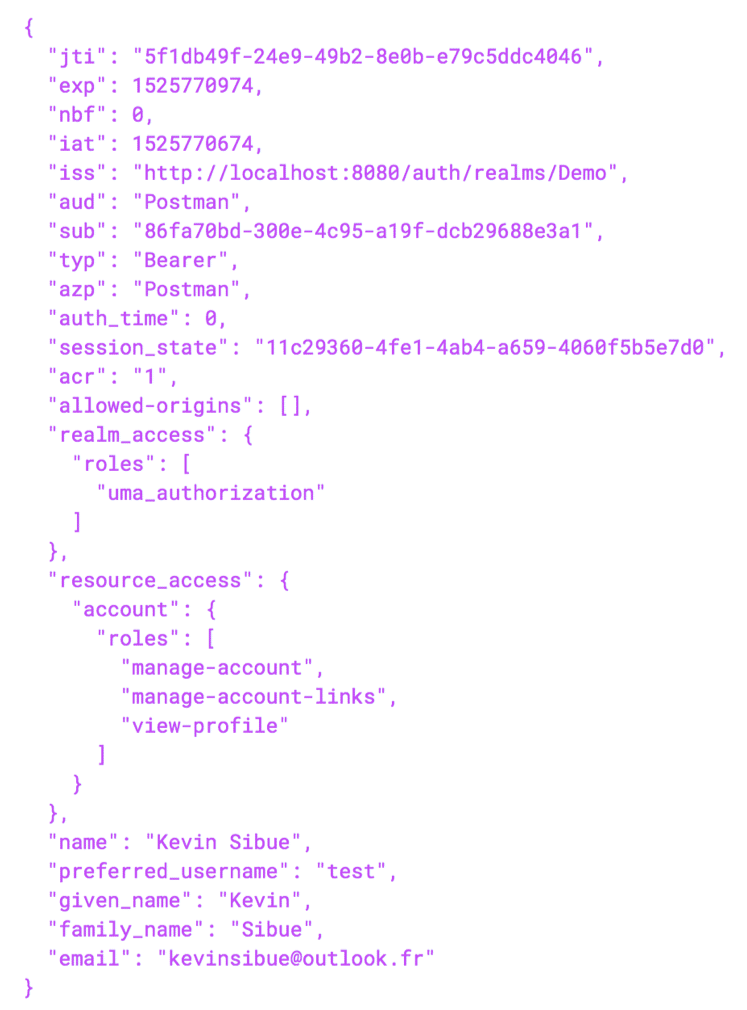
If you wish to see these data, I invite you to use the site: http://jwt.io which will be able to show you all the data that your token contains. Note that these data constitute all the information relating to the user provided in ID token format.
Free and easy to use, Keycloak is a high-performance access manager
As you have been able to observe, it is very simple to generate a Keycloak backend and start authenticating users. It can save you lots of time by eliminating the need to develop an authentication layer and/or allowing you to authenticate users from several different clients (website and mobile app).
I hope you have enjoyed this article. Please feel free to share it!