Why should you create an Objective-C library with Xamarin.Mac?
Xamarin has long been recognized as an interesting framework for the creation of cross-platform applications, especially for iOS and Android. If you are a fan of C# and its many advantages, this is the framework for you.
Of course, Xamarin also offers the opportunity to port C# applications for Apple’s desktop operating system: MacOS. As you probably know, Xamarin.Mac is a direct result of the Mono project with GTK. But significantly, with Xamarin.Mac it is possible to directly design a page through the use of native tools and controls (NSButton, NSProgressIndicator,…) with XCode and Interface Builder. This makes the look-and-feel of your application much closer to a classic Mac application than with GTK.
And that’s not the only good news: you also have the opportunity to use a very large number of NuGet libraries in your application, made available by the community, such as Newtonsoft (allows simplified management of JSON in a .NET application, which has become the benchmark nowadays).
Like the .NET community, the Apple community is also very active and MacOS (previously Mac OS X or simply OS X) has been around for a long time so there are already a large number of so-called native libraries available – perhaps you have already created one yourself!
But what if I told you that it is possible to use one of these libraries (a classic “.framework” file such as “IOKit.framework” or even “NotificationCenter.framework”) in your Xamarin.Mac application in the same way as a NuGet library?
Sounds good, right?
Doing this will allow you to reuse anything you have created to extend your application without having to recreate everything from scratch and will allow you to design libraries in objective-c rather than C#.
Why does Xamarin.Mac generate problems when using libraries?
Xamarin.Mac, just like its big brothers iOS and Android, allows developers to use the native SDKs of different platforms. As such, they ‘bind’ themselves to the existing APIs of these platforms and expose them.
Unfortunately, Xamarin.Mac is less advanced than some others, and a large number of APIs (especially at the lowest levels) are not always directly accessible in C#. This can prevent you from creating the program you want.
But as mentioned above, we can link an Objective-C library to our C# code so it is possible to work around the problem.
How? Read on!
How to create an Objective-C library for OSX with Xamarin.Mac
Here is your simple, three-step guide to getting it right.
Step 1: Creation of a new library in Objective-C
To start with, we will create a new library for MacOS in Objective-C.
Let’s take the simple example of the MacOS X Carbon library. This library, in particular, allows for interaction with technologies such as HID (for example, the keyboard and mouse).
On MacOS this library allows for the current layout of a keyboard to be changed, switching from a French keyboard (AZERTY) to an English one (QWERTY) or vice-versa, for example, without going through the graphical interface.
But there’s a problem: Xamarin.Mac unfortunately does not allow this since Carbon has not been ported for Microsoft technology.
To resolve this, create a new “Framework” type project in the “MacOS” tab.
Give it a name, a bundle id and all the required information just as normal.
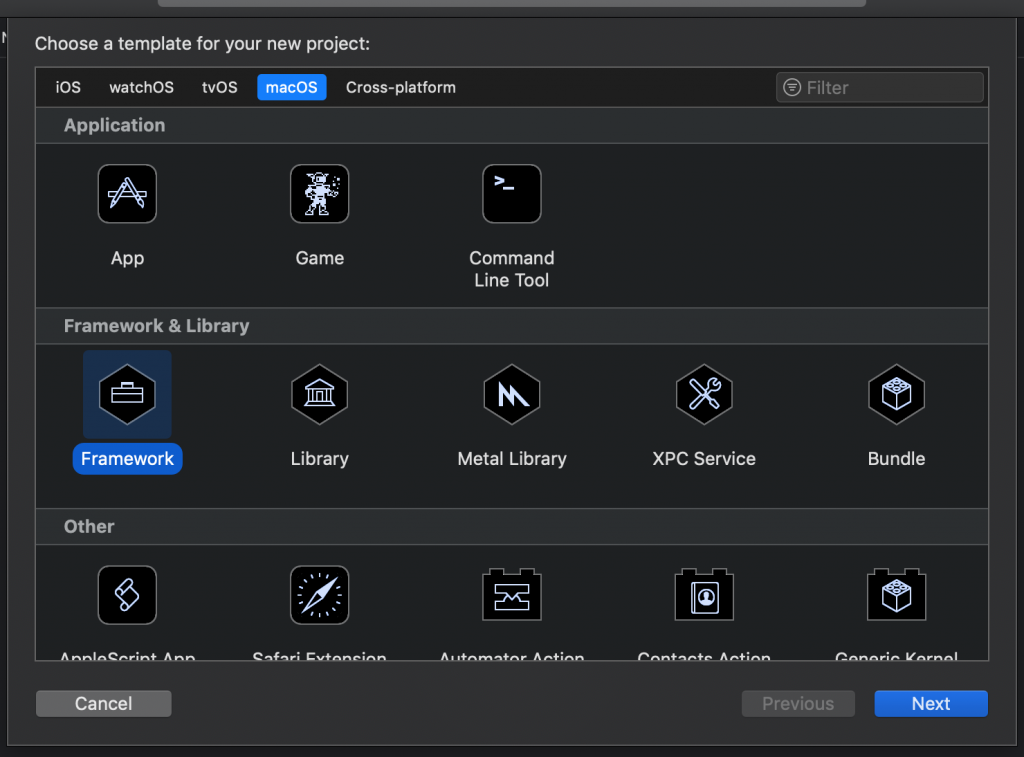
XCode will automatically create a class for you.
You can rename this class as you wish; its name is of little importance in this case.
Next, you’ll need to add a few “includes” to make it all work:

The most important of these here is “Carbon/Carbon.h” which gives access to all the constants and methods we need for our method to work:
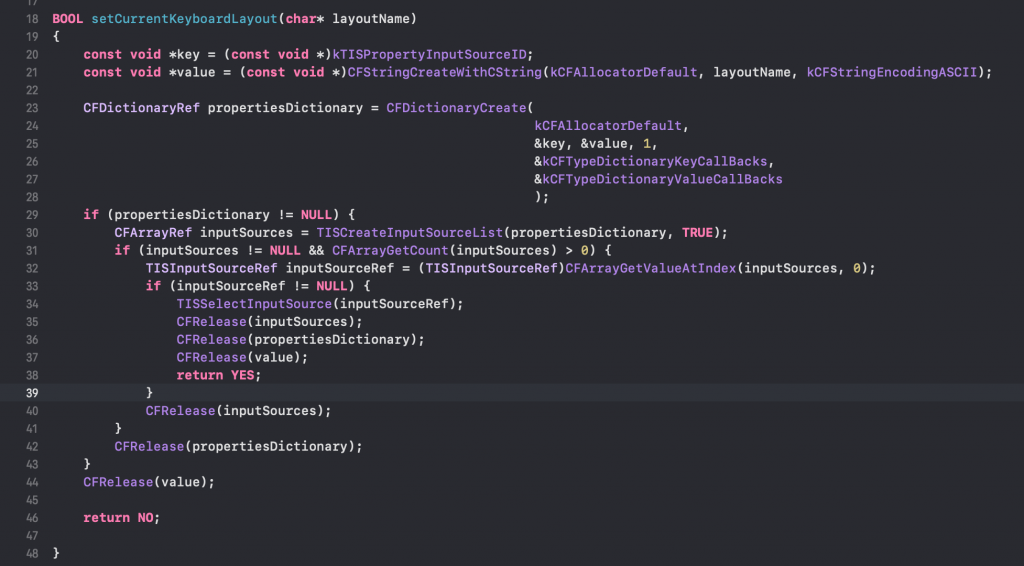
To make it simple, we take a character string for the name of a layout as input.
On MacOS a layout has a name such as: “com.keyboardlayout.ABC”.
Our algorithm searches to confirm if this layout is available on the current machine and, if so, to activate it.
We will return TRUE if the layout is found and FALSE if not.
Step 2: Import the library into our code
Now that our code is ready and compiles, we need to create the compiled version of our library and then import it into our C# code.
To do this, once compiled (if possible, in the Release version) retrieve the framework file located in the “Products” folder:
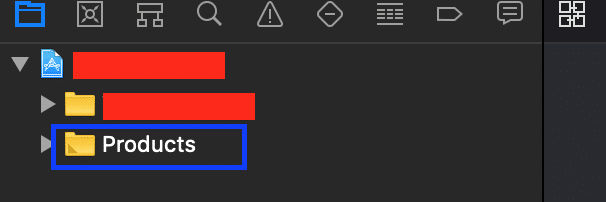
In this folder you will find a file with the extension “.framework”.
You probably know that this type of file is a folder containing a set of files. Here is an example:
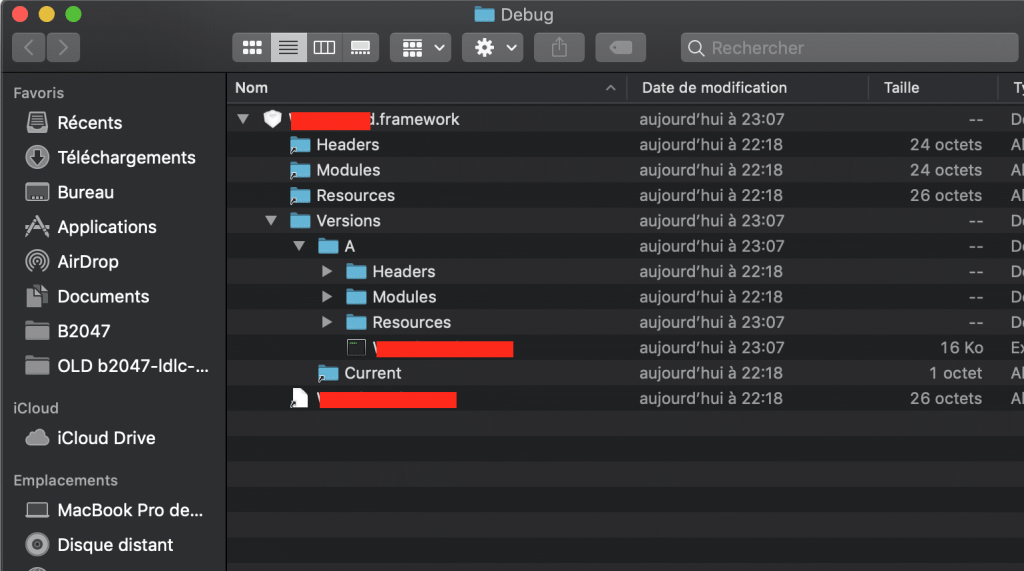
Of particular interest to us here is the file contained in the “/Versions/A/[FrameworkName]” folder.
This is the part that needs to be referenced in your Xamarin.Mac project.
Copy this file into your project before importing it, then go back to Visual Studio and reference your brand-new library via the “Native Reference” menu:
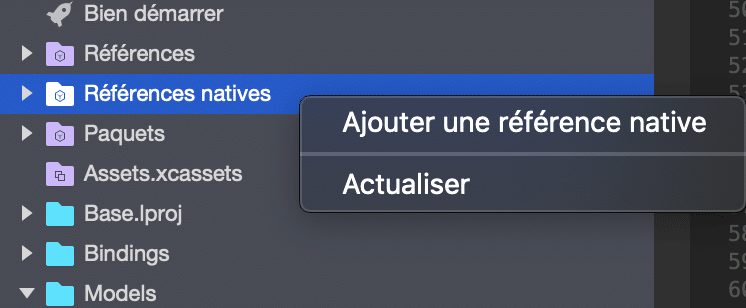
From this point, your MacOS application will include your library.
But now we have to be able to use it.
Step 3: Create a C# wrapper for our calls
To be able to use your library, it is necessary to create a C# wrapper that will call the native library and convert objects between the two if necessary (for example, from String to NSString, and vice versa).
You should create a static class for this, and this will contain all the necessary Import DllImports, as well as the methods that will allow its use.
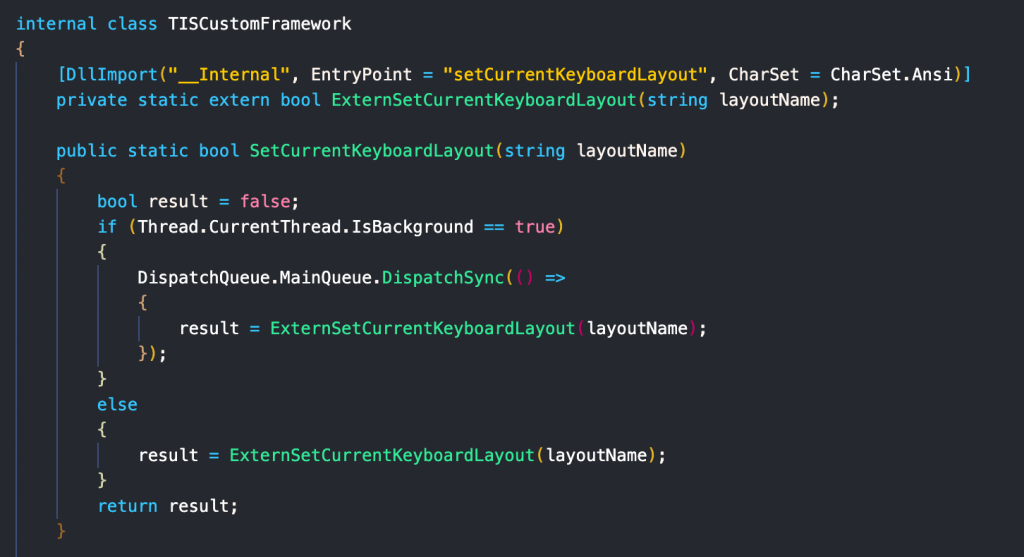
As you can see in the screenshot above, we create an “extern” method decorated with a “DllImport”.
The important thing here happens to be its first parameter: “__Internal”. This parameter allows you to bind the library you have recovered. With a different value, Xamarin will search the file system of its runtime environment.
The second parameter, “EntryPoint”, allows the method on which we “bind” to be defined. This must, of course, be available in the .h of your code and be public. I recommend you suppress this private method and reveal a public method making the necessary verifications.
In this case, most of the TIS methods must be executed on the MainThread, which is what my public method does here.
And that’s it!
Go Further
In some cases, you will need to retrieve objects or structures more complex than a simple boolean. To do this, use the following method:

Replace the “…” with an Objective-C method returning the pointer to an object of the type defined between less than/greater than (here NSString) to convert it into an object usable in your C# code without starting to use IntPtr.
But what about Swift?
OK, so now you’re probably thinking: It’s 2020: where does Swift fit in?
And I agree with you!
Unfortunately, Xamarin.Mac only supports binding with Objective-C libraries at the moment. The Swift binding is not official…yet! However, Microsoft and the Xamarin team are already working on this topic.
If you want to know more, read this article from the Microsoft documentation, but for now, if you really want to use Swift, you will need to go through an additional binding library.