Amazon Web Service offers a very large panel of tools to manage Cloud services. The question is “how to keep server management simple ?”.
I would recommend using PaaS service for Web Service and Web Site hosting. PaaS mean Platform As A Service. With this kind of solutions, your life is quite simple. You don’t need to care about the Operating System, the Web server or any security patch to apply on the infrastructure that hosts the service..
With PaaS, you only need to concentrate on how to deploy your web application in a container or a bucket that will run your system. For sure some knowledge is necessary to understand how to configure it, but the idea of the PaaS approach fits with our need: simplify!
Let’s see how to deploy a PHP Symfony application on Amazon Elastic Beanstalk, the Web PaaS container on AWS.
We will review how to configure the Symfony project for AWS and create the associated database (using RDS, the PaaS database service in AWS) with some fixtures.
To follow this tutorial, you will need to have a valid account on AWS (a trial version works perfectly), Elastic Beanstalk command CLI tools (you can find that here) and a Symfony project with entities.
For this article, I am using Elastic Beanstalk command instead of AWS command. You can argue that EB is obsolete but it still works and again matches with our objective: it is simple to use!
First you need to configure Elastic Beanstalk
Go into your project source code folder:
| Witekio.com:~ witekio$ cd <project-folder> |
Initialize your repository for Elastic Beanstalk
| Witekio.com:~ witekio$ eb init |
During the current process, you will enter your AWS ID key and password. This command will create a folder .elasticbeanstalk containing the Elastic Beanstalk’s configuration.
Phase 2, create your Elastic Beanstalk environment
Create your AWS environment by typing this command :
| Witekio.com:~ witekio$ eb create <env-name> |
It will create your environment <env-name> on AWS cloud. It will use your configuration in file “.elasticbeanstalk/config” to create this environment. At this moment, you will be able to review the environment you just created directly in the AWS web interface.
Add your command hook to execute command after file deployment
To make a proper installation of your Symfony project, you will need to execute command after the file deployment. To do that, you need to create a hook in the “.ebextensions” directory. AWS then reads the .config files from “.ebextensions/” and runs them by alphabetical order.
Create a file named 01-main.config and edit this content:
commands:_x000D_ _x000D_ 01-composer-update:_x000D_ command: "export COMPOSER_HOME=/root && composer self-update 1.0.0-alpha11"_x000D_ _x000D_ container_commands:_x000D_ 02-get-composer:_x000D_ command: "composer install --no-interaction --optimize-autoloader"_x000D_ 03-drop-database:_x000D_ command: "php app/console doctrine:database:drop --force --if-exists"_x000D_ 04-create-database:_x000D_ command: "php app/console doctrine:database:create"_x000D_ 05-create-schema:_x000D_ command: "php app/console doctrine:schema:create"_x000D_ 06-load-fixture:_x000D_ command: "php app/console doctrine:fixtures:load -n"_x000D_ 07-clear-cache:_x000D_ command: "php app/console cache:clear -e=prod"_x000D_ 10-delete-dev:_x000D_ command: "rm web/app_dev.php"_x000D_ _x000D_ option_settings:_x000D_ - namespace: aws:elasticbeanstalk:application:environment |
01-composer-update: Allows to create COMPOSER_HOME environment variable for composer.
02-get-composer: Allows to install all vendors for Symfony project and execute composer.json’s script.
The commands from 04- to 06-, allow to recreate the database with fixtures data.
07-clear-cache: Allows to load “cache:clear” command in production environment.
10-delete-dev: This command is optional and allows to delete app_dev.php file. This file is unnecessary for the production environment.

The tag “commands” allows to execute commands, for instance EC2 and the tag “container_commands” allows to execute commands into project directory.
Now you can deploy your source code on Amazon cloud
| Witekio.com:~ witekio$ eb deploy |
Once you have completed the previous steps, you can execute this command to deploy your source code on Amazon cloud and run your setup scripts.
 If the project folder you are working in is a git repository (with .git folder), be aware that only committed files will be sent. Be careful if you perform local modifications in your folder. Your newly created “.elasticbeanstalk” folder will have to be managed in your git ! If your folder is not a git, all files will be sent.
Last but not least, configure your web server in the Amazon Web Service console
AWS allows you to configure your web server. To do so, you can set up a JSON file in “.ebextensions/env/“ or perform modification directly in the Amazon Web Service console on the website.
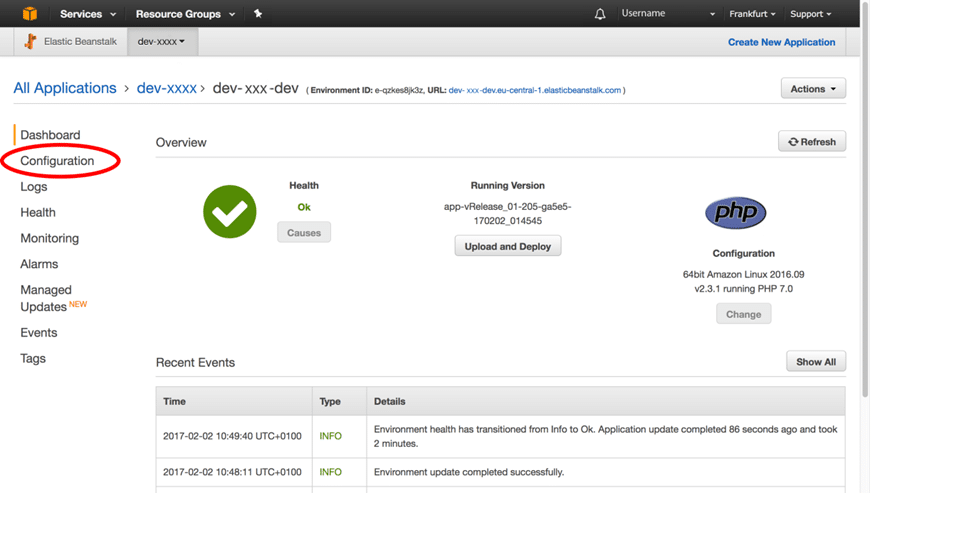
These are the few simple steps to follow: First from AWS console, choose Elastic Beanstalk and choose the environment you want to set up. In this page, choose the “configuration” section in the left menu, and then select software configuration parameter.
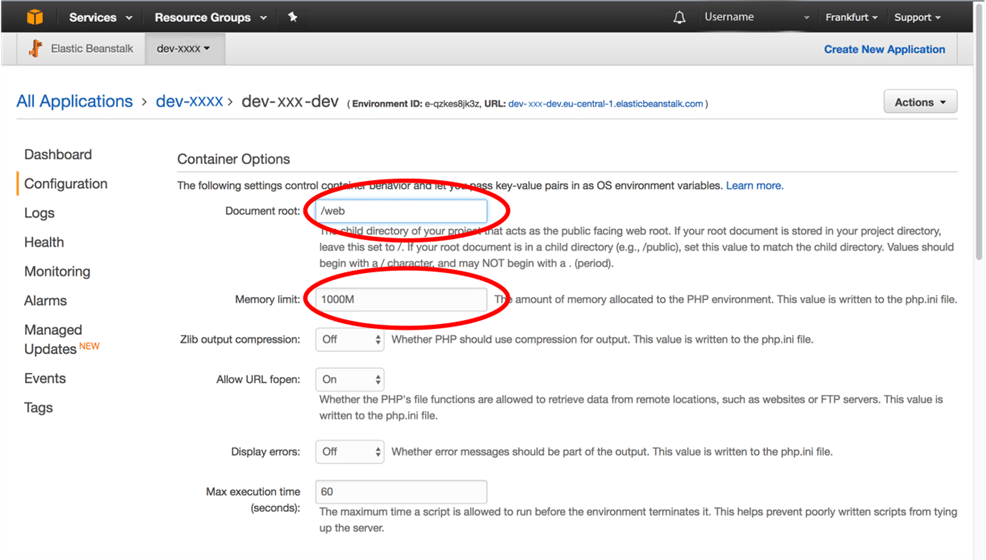
To configure the required redirection for Symfony, you can change the document root settings. In regard to your project size, I recommended that you pay attention to the setting of the PHP memory limit.
AWS Elastic Beanstalk allows an easy deployment with an easy to script based mechanism. As shown, PHP Symfony application can be deployed in 5 simple steps, and you can easily adapt this procedure to other website technologies or frameworks.
Again, the only thing you really have to pay attention to is your git repository if you have one. It is really easy to forget the .elasticbeanstalk folder!